Shipper Online
-
Creating a Shipment

1. Go to https://shipper.dpd.be
2. Log in using your given login and password.
3. Open the Shipments screen
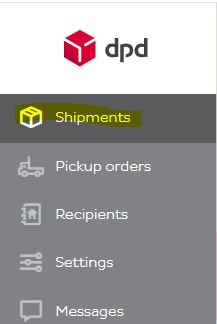
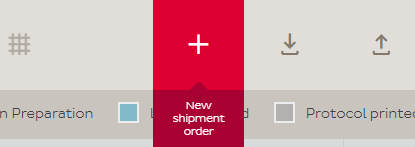
4. Click in the top menu on New Shipping Order
5. In the Receiver section, you fill in the mandatory fields (Name, street, house number, zipcode, city and country)
6. In the Base Data you can select either DPD Fresh or DPD Freeze

7. In the Parcels section, you can insert how many parcels this shipment will contain.
- Enter the Weight. If all parcels within this shipment have the same weight, you can select All parcels have the same references.
- References are a free and optional field. This can contain your own reference such as an order or invoice number.
- If you’re using DPD Fresh you will also have to mention the Storage Temperature as well as Expiration Date

8. Click on Save to save your shipment. It will now appear in your shipment list. You can also opt to click Save & New which will save the shipment and immediately open a new screen to insert a new shipment. Print & New does the same, except that it directly prints the label(s) too.

9. In case your shipment wasn’t printed yet, you can select it in your list and click on Print Labels for selected shipments

At the end of the day, you can execute an End of Day procedure. Instruction for that can be found here
-
Requesting a driver Pickup
CREATING AN IN SHIPMENT PICKUP (Shipment + Pickup order)
1. Go to https://shipper.dpd.be
2. Using the provided login information login to DPD Shipper.
3. Open shipments screen.
4. Click on “New Shipment order” button.
5. In “Recipient” section fill in all the mandatory fields *Name, Street, Building number, ZIP, City, E-mail or phone number)
6. In “Base data” section select Product DPD Freeze or FRESH. (Additionally, you can select “Additional services” too)
7. Check the checkbox ‘Request pickup’ and select desired pickup date in selection ‘Pickup date’.
8. In “Parcels” section set the needed parcel count for selected ‘Product’. Input the ‘Weight’ of the parcel. (If weight and parcel dimensions are the same you can check the checkbox ‘All parcels have the same dimensions’)
8.1. ‘References’ are optional selection.
8.2. If the selected product is ‘FRESH’ you need to input, the product ‘Expiration date’ and ‘Storage temperature’.
9. Click “Save”. The created shipment will be displayed in the “Shipments” screen.
9.1. You can click ‘Save & New’ if you want to create another shipment. Or you can click ‘Print & New’ if you want to print label for created shipment and make a new shipment.
10. In “Shipments” screen select shipment using the check box and click ‘Print labels for selected shipments’
11. In “Pickup orders” screen you can check your pickup order. (Pickup date, number of parcels, order state)
CREATING A SEPARATE PICKUP ORDER
1. Go to https://shipper.dpd.be
2. Open Pickup Orders and click the ‘+’ sign

3. All your address and contact info will be filled, please complete the desired pickup date (can not be today)
4. Choose a number of parcels to be picked up
5. Continue and confirm
-
Basic Settings
Go to Settings screen.
Click on Basic
- Default product The chosen product will automatically be set as a default product when creating new shipment or importing shipment without product.
- All parcels have same dimensions If all parcel dimensions the same for all shipments you can check this.
- Default parcel width(cm);Default Parcel height(cm);Default parcel length(cm); Default parcel weight(kg) You can enter default values if all shipments are the same weight, length, width and height.
- Default shipment note This is a default note for all parcels.
- All parcels have the same references If this is checked then all parcels will have the same reference information added to them.
- Number of shipment references and Number of parcel references Defines how many references it is possible to add to parcel or shipment.
- Default parcel reference 1 and Default parcel reference 2 You can write the default parcel reference which will be added to parcels.
- Default sender HMRC number You can set default HMRC number.
- Free parcel numbers expiration warning limit You can set when to show a warning that parcel range at the limit.
- Default recipient language You can select the default recipient language.
- Minimal characters count for recipient’s search To search for recipient how many characters you need to write so that search would start.
- Return to shipment list after saving When you create a new shipment in Shipments screen and save the shipment you are returned back to Shipments screen.
- Return to recipient list after saving When you go to Recipients screen and create new recipient, after saving you are returned to Recipients screen.
- Add/update recipient data after order save When you create a new order, the recipient will be automatically saved to your address book.
Click Save when you have set settings accordingly to your needs.
-
Printing
Go to Settings screen.
Open Print settings.
- Paper size for labels printing– Choose A4 or A6 paper size. The Default label size is A6.
- Choose the printer paper size (A4 or A6). If you choose A4 you can set the default print position in A4 paper print start position.
- If you want that DPD Shipper remembers print position, check Remember last A4 print position. If you want manually select print position, check Show label position dialog when position is not remembered.
- Print note on labels– Prints notes on the label. For example, if there are notes made in Sender note on the label, those will be shown on the label.
- Sender note on the label– Sender can make default note which will be shown on the label.
- Sender note is before address– If checked it will show sender note before the address.
- Part of labels to be printed larger – If there is a need for some text to be larger and in bold you can set it with this option.
Click Save.
-
Importing Shipments and Receivers
This requires a valid import profile, which we will will help you creat. More documentation to follow soon
Shipment import
1. Login in on DPD Shipper using your credentials.
2. In ”Shipments section” select <Import shipment orders>.
3. Locate and select import file on your computer.
4. Select <Import>
5. Close the window.
6. Refresh page to see newly imported shipments.
Receiver import
1. Login to your DPD Shipper account.
2. Go to “Recipients” screen
3. Click on “Import recipients”
4. Click on “Select file…”
5. Choose your recipient import file.
6. Click on “Import”
7. After the import has been successfully completed you can close the “Import recipients” screen.
You can reach DPD Shipper via the site: https://shipper.dpd.be
It can be run in any supported HTML web browser: Edge, Chrome, Firefox, Safari
This page is still under construction and will soon be filled with more information