Operating systems supported
Login Configuration System Reqs
Introduction
-
Introduction
To simplify parcel delivery processing, we have developed DPD Shipper – the parcel label printing solution. DPD Shipper lets you create parcel labels instantly and effortlessly.
- Optimized address data quality (immediate verification of postcode and country combination)
- Own service for server installations
- Record your reference number (order number) and track your parcels using your reference number.
- Print your parcel labels automatically or manually.
- Acceptance protocol is automatically created when a daily procedure is done
- Supports new DPD services such as DPD HOME, DPD CLASSIC Predict, DPD COMFORT
- Use the acceptance list as a handover receipt (liability)
- PostgreSQL support for very large packets
1.1 Operating systems supported.
DPD Shipper can be installed on the following operating systems:
- Windows 7 SP1 (x86 and x64)
- Windows 8 (x86 and x64)
- Windows 8.1 (x86 and x64)
- Windows 10 (x86 and x64)
- Windows Server 2008 R2 SP1 (x64)
- Windows Server 2012 (x64)
- Windows Server 2012 R2 (x64)
1.2 Hardware requirements
The following hardware requirements must be met for DPD Shipper to be installed:
- 1 GHz or faster CPU
- 512 MB RAM
- 5 GB of free space (x86 and x64)
-
Installation
DPD Shipper can be installed in two ways: The differences are as follows:
- When installed as a Windows application, the program can access all printers and network drives installed on your computer. However, the program must be run manually.
- When installed as a Windows service, the program is running in the background at all times and does not need to be started manually. However, by default, the service does not have access to printers that have been installed on a print server and then shared.
Start the installation by running the setup file ‘DPD Shipper_X_X.exe’.
2.1 Install .NET Framework
If the Microsoft .Net Framework 4.6.1 is not already installed on your computer, you will be prompted with the option to install .Net Framework 4.6.1 or newer.
If you are not prompted to install the .NET Framework, please continue with one of the following points.
2.2 Installation as a Windows application
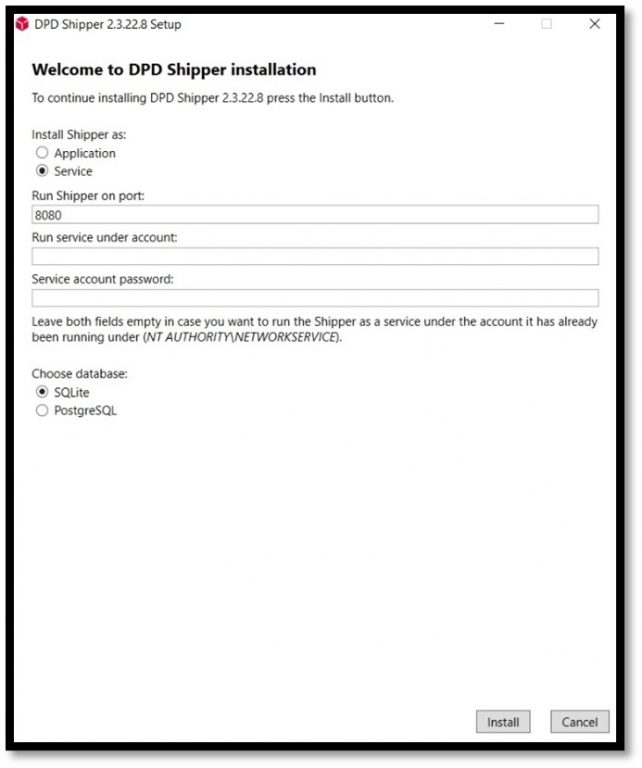
- For installation as a Windows application, select ‘Application’ after starting the installation file and choose the database you want to use. After selecting the wanted database, click on ‘Install’.
By default SQLite database. If service on operating system is under specified account, it’s possible to input service account.
If selected database is PostgreSQL you must have set up PostgreSQL database. Default PostgreSQL port is 5433. Important: Must be created log database too. Example: {PostgreSQLDatabaseName}_log
Default DPD Shipper port is 8080.
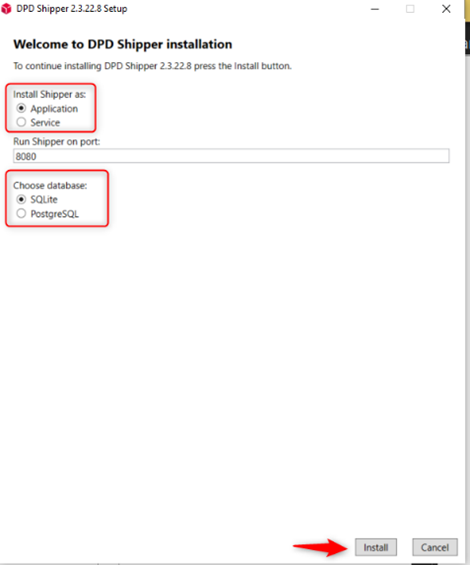 Figure 1: Installation start
When the installation is complete, you can start DPD Shipper via the icon on the desktop. The following message is displayed:
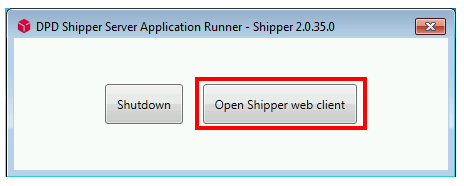 The program can be terminated by clicking ‘Shutdown’. Clicking ‘Open Shipper web client’ opens the interface in the default browser.
2.3 Installation as a Windows service
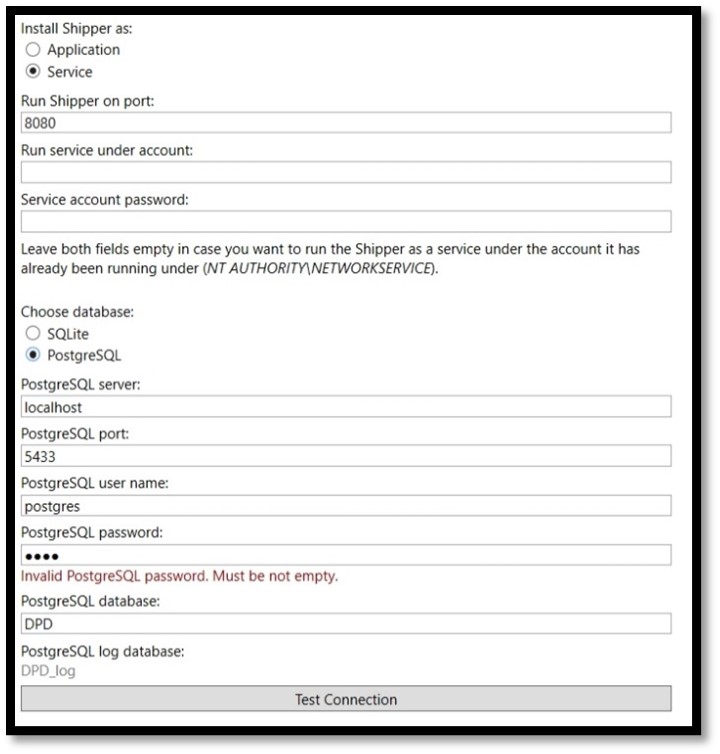
For installation as a Windows application, select ‘Service’ after starting the installation file and click Install and choose the database you want to use. After selecting the wanted database, click on ‘Install’.
By default SQLite database. If service on operating system is under specified account, it’s possible to input service account.
If selected database is PostgreSQL you must have set up PostgreSQL database. Default PostgreSQL port is 5433. Important: Must be created log database too. Example: {PostgreSQLDatabaseName}_log
Default DPD Shipper port is 8080.
Once the installation is complete, you can open the DPD Shipper web interface via the icon on the desktop.
2. 4 Activation code input or configuration file import
To use the full version, you must activate a configuration. The configuration can be managed inputting activation code OR uploading configuration file.
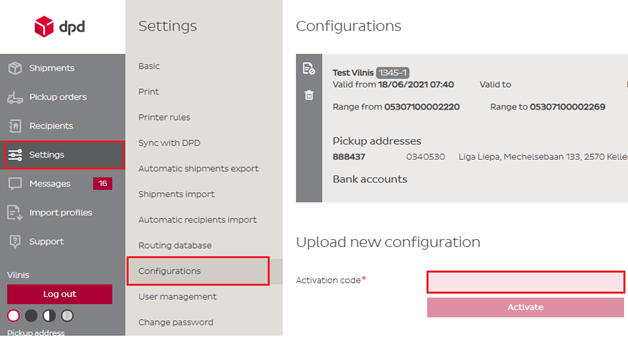
Activation code
You will receive an activation code. Enter and activate your activation code:
Settings → Configuration → Activation code
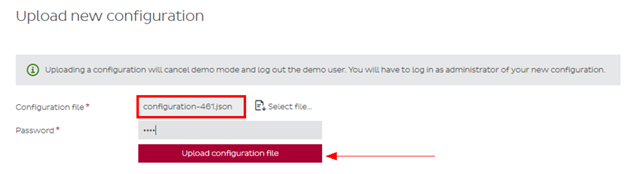
Configuration file
You will receive a configuration file from DPD along with your personal installation password.
Save the file locally on your computer and follow the steps:
Settings → Configuration → Select file
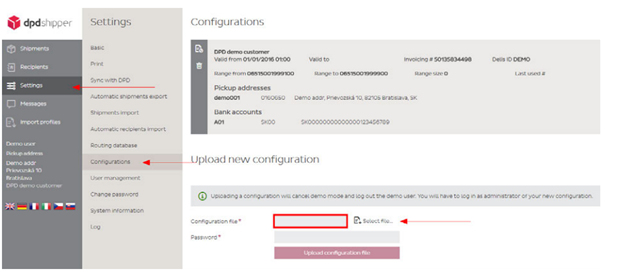
Choose the configuration file from destination folder, enter the password to complete the setup and click on Upload configuration file
-
First log-in and user management
Log in using the provided login and password. Login and password are configuration specific and provided with the activation code or configuration file.
For the DPD Shipper administrator, please use the following log-in information:
User: admin@<<Your account>>
Password: secret
 Please note that usernames and passwords are case-sensitive.
You can add and manage additional users under the menu item Settings à User management
The program recognizes two different user roles:
– Creator
– Administrator
As Creator, you create and print the parcel labels and the collection list (shipping list). The Creator also has limited rights to modify settings, such as the configuration of a printer. In addition, access to certain clients (collection addresses) and services can be restricted.
The Administrator has the same functions as the Creator, but in addition also has all rights to make basic settings during installation.
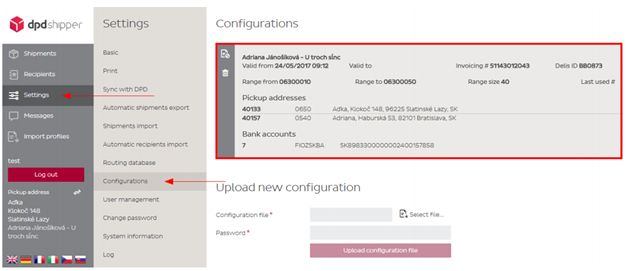
3.1 Check the uploaded configuration
You can now check the uploaded configuration in Settings → Configuration